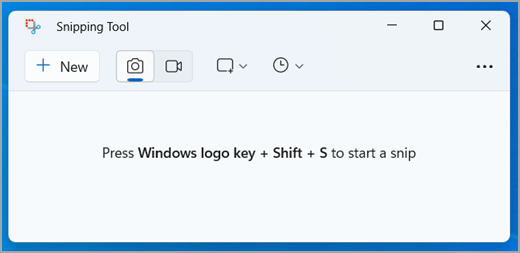
You can easily take a snapshot of any part of your PC screen to capture text or images. The Snipping Tool allows you to edit, annotate, save, and share these screen captures effortlessly.
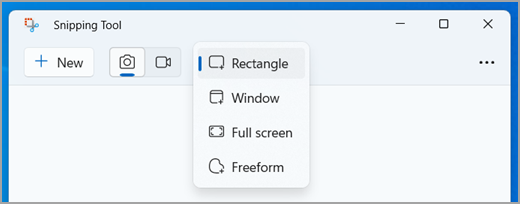
You can capture several types of snips, such as:
| Freeform | Draw around any object freely to create a custom-shaped snip. |
| Rectangle | Drag to form a rectangular shape around the area you want to capture. |
| Window | Pick any open window, such as a dialog box, to capture. |
| Full screen | Capture the entire screen in one go. |
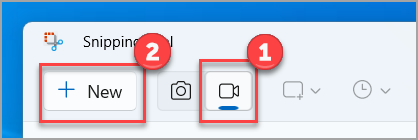
| Video snip | Record a video of a specific area of the screen. |
Once you take a snip, it’s automatically placed in the Snipping Tool window where you can modify, save, and share it.
Open Snipping Tool
There are four different methods to open Snipping Tool:
- Click the Start button, type snipping tool, and select Snipping Tool from the results.
- Press Windows logo key + Shift + S for a static image capture.
- Press Print Screen (PrtSc) to take a static image capture.
- For a video capture, press Windows logo key + Shift + R.
Capture a snip
To capture a snip, open Snipping Tool and select Mode. In older versions of Windows, click the arrow next to the New button. When the screen dims slightly, select the area you’d like to capture by dragging the cursor over it.

Annotate a snip
Once you have captured your snip, you can:
- Write or draw on it using the Pen or Highlighter tools.
- Add shapes or emojis by selecting the Shapes button.
- Use the Eraser to delete any markings or shapes you’ve added.
- Crop the image by clicking the Image crop button.
Capture a video snip

Add captions or audio to a video snip
After recording your video snip, click the Edit in Clipchamp button to add Captions or Audio.

Generate and add captions
- Go to the Captions tab and click Transcribe media.
- Choose your language and filter options from the pop-up window.
- Click Transcribe media to generate captions for your video.
Add and detach audio from the video snip
- Select the Audio tab in the sidebar.
- Adjust the audio volume between 0 and 200%.
- To download the audio file separately, click the Detach audio button.
- To access the downloaded file, press Windows logo key + R and type “downloads” in the run dialog box.
For more information, visit Add captions and audio description to a Snip video.
Save a snip
- Once your snip is captured, click the Save as button.
- In the Save As window, enter a file name, choose a location, select a file type, and then click Save.
Share a snip
After capturing a snip, click the See more menu in the top-right corner, then select Share.
Copy or redact text
After capturing a snip, click the Text actions button to enable the Optical Character Recognition (OCR) feature. This allows you to extract and copy text from your snip or quickly redact sensitive information like email addresses or phone numbers. Text recognition is processed locally on your device.
Keyboard shortcuts to use in Snipping Tool
| Press these keys | To do this |
|---|---|
| Alt + M | Select a snipping mode. |
| Alt + N | Create a new snip using the previous mode. |
| Shift + arrow keys | Move the cursor to choose a different snip type. |
| Alt + D | Delay the snip by 1-5 seconds. |
| Ctrl + C | Copy the snip to the clipboard. |
| Ctrl + S | Save the snip. |
Enlarge, rotate, or crop your image snip
To resize, rotate, or crop your captured snip, open it in Snipping Tool, select Edit > Edit with Paint, and use the tools available to enhance your image.
Print an image snip
To print your snip, right-click on the saved file in its folder, select Print, and adjust your print settings.
Place Snipping Tool on the taskbar
In the taskbar’s search box, type snipping tool. Select the Snipping Tool app and click Pin to taskbar for quick access.
Delay your screenshot
Before taking a snip, select the menu or element you want to capture. In Snipping Tool, click Delay and choose a delay time, such as 5 seconds. Click Mode to start the countdown, and within those 5 seconds, arrange your screen. Once the time is up and the screen turns gray, capture the desired area using the mouse.
